How to build a bicycle wheel
Where I learned to build wheels
This is a simple protocol of how to build wheels, not a comprehensive description of the bicycle wheel. There are many people that know more about wheels than me. A few people in particular that have helped me out are Max Poletto, under whose guidance I built my first wheel.
Bikes not Bombs offers an excellent wheel building class, which was taught by Charlie Schubert when I took it in the winter of 2009.
The Bicycle Wheel, by Jobst Brandt offers a thorough, technical, description of wheelbuilding.
Selection of materials
Recommended wheelbuilding equipment
In addition to the components to make the wheel (rim, spokes, hub, nipples, and rim tape), this is the equipment I use to build wheels.
-
Truing stand: I am perfectly satisfied with the Park home mechanic truing stand. The "professional" version is nice in having truing calipers for both sides of the rim, but it is much heavier and more expensive.
-
Spoke wrench
-
Digital calipers: useful to measure spokes, hubs, etc. Can be purchased on amazon.com for less than $20
-
Dishing tool: not strictly necessary. You can dish a wheel by reversing it in the truing stand, but I find the tool is so much easier.
-
Tensionmeter: also not obligatory. Some people can tell spoke tension by plucking the spokes. However, unless you have perfect pitch the tensionmeter makes things much easier.
-
Spoke prep is goo that should be spread on the spoke threads (see below).
-
Chain lube: to lubricate spoke holes
The proper length of spokes is dictated by the diameter of the rim and hub as well as the desired spoke lacing pattern.
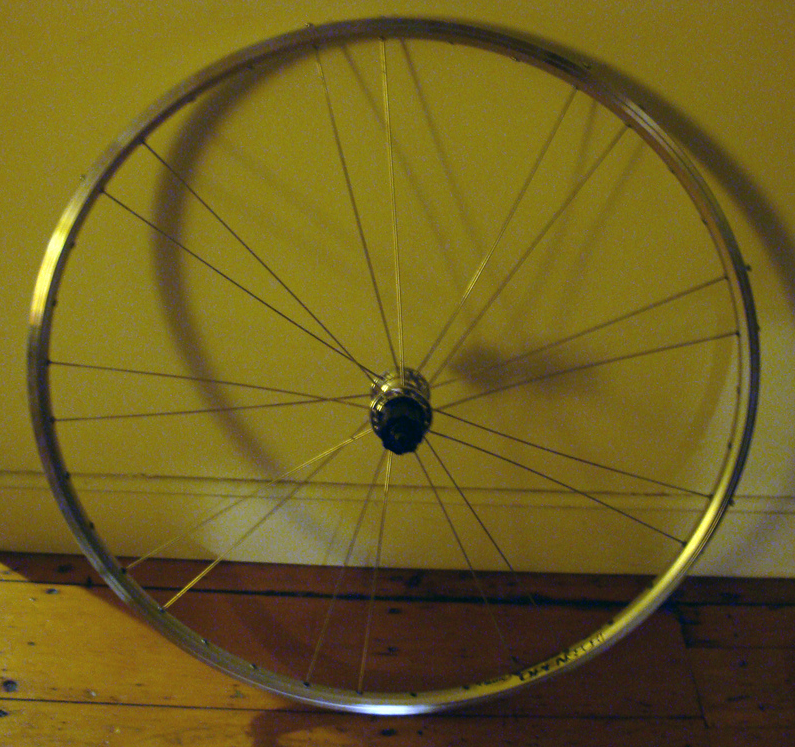
Lacing the wheel
Key things to keep in mind:
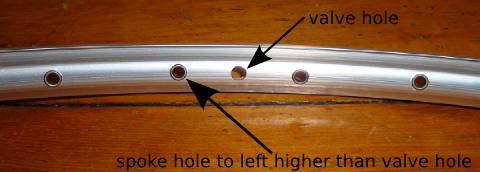
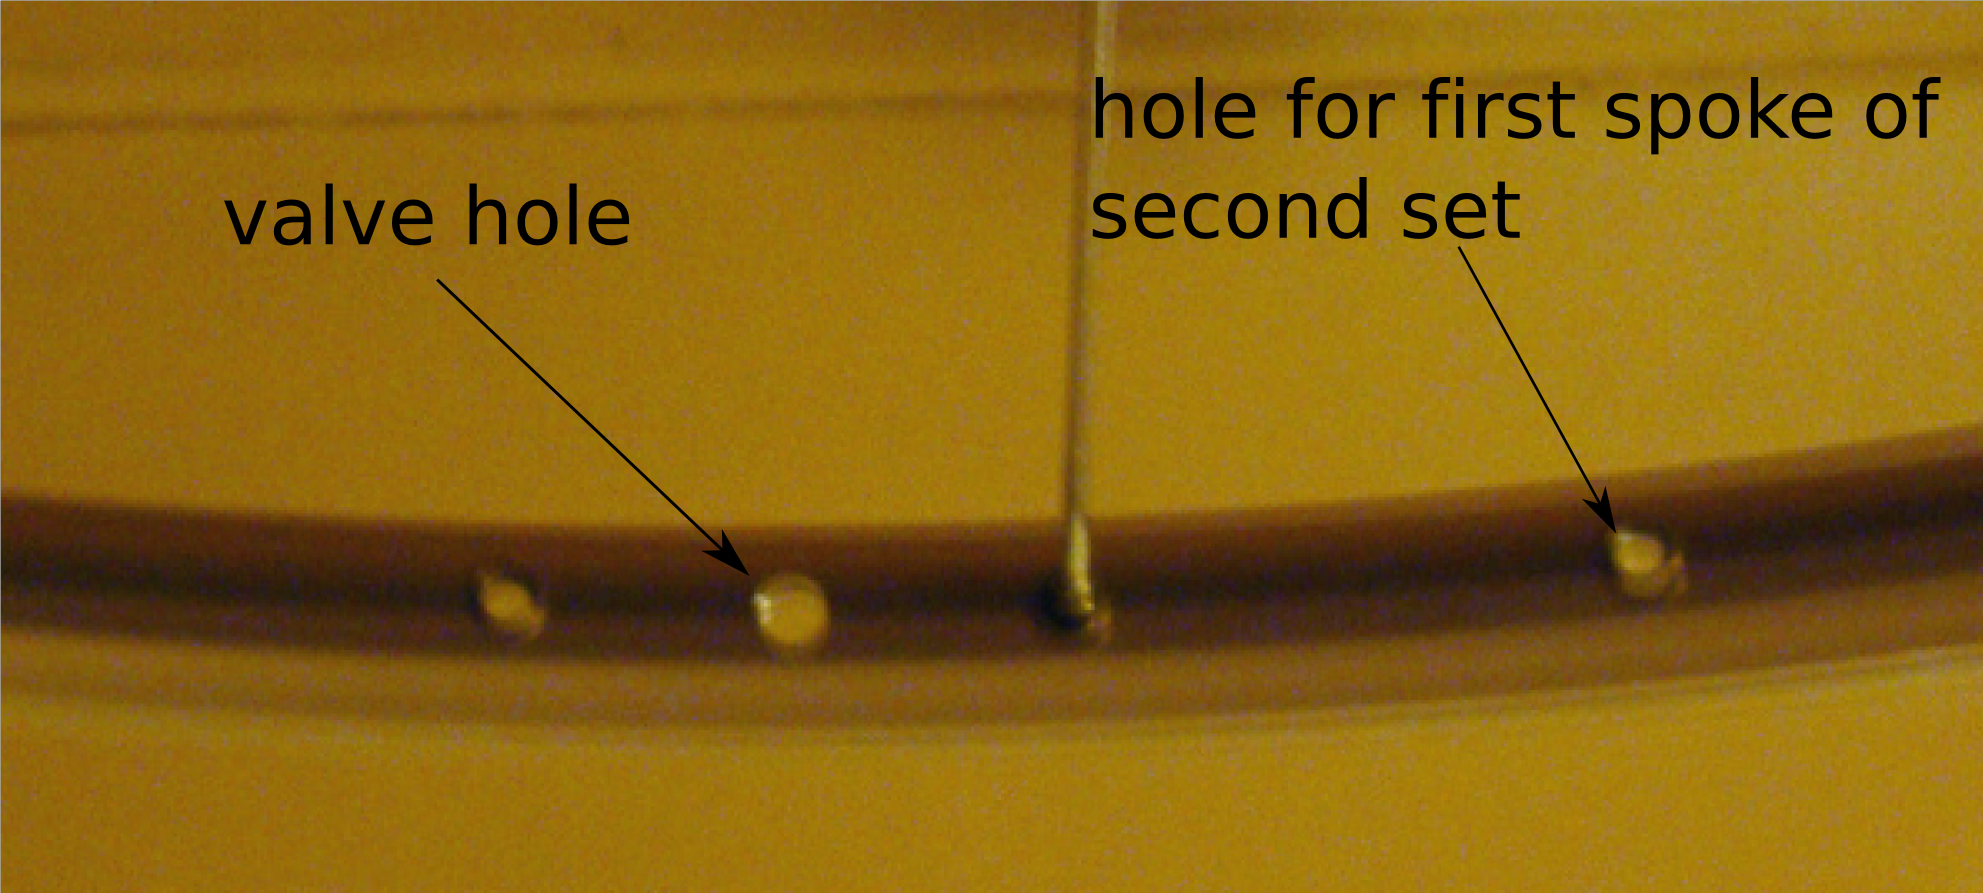
- This lacing procedure results in the valve stem hole being between two nearly parallel spokes. This is important to allow easy access of a pump for tire inflation.
- On the rear wheel, it is better to have the pulling spokes on the drive side as inbound spokes. Inbound spokes are those that that their spoke heads between the hub flanges.
- When lacing a rear wheel, the spokes on the right side will generally be shorter than those on the left. Keep the two sets of spokes separate.
Adding spoke prep
Spoke prep functions like teflon tape to fill the gaps between the threads on the spokes and the nipples. The Wheelsmith spoke prep comes in two colors so that you can add a different color to each set of spokes for a rear wheel. Apply by dipping the threaded end of the spokes in the spoke prep and twirling the spokes to thin out the spoke prep. Allow the spoke prep to dry before lacing the wheel. The ideal amount of spoke prep fills the threads but leaves the top of the threads visible.
The first set of spokes
- Step 1: Hold the rim in your lap with it oriented such that the valve stem hole is on the opposite side. Flip the rim so the spoke hole to the left of the valve hole is higher than the valve hole.
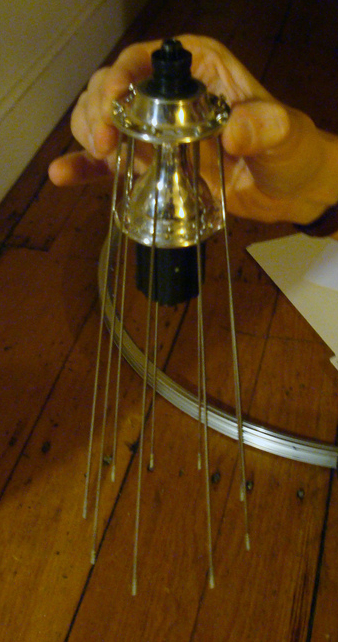
- Step 2: Hold the hub vertically. If it is the rear hub, the sprocket side should be facing down. Drop a spoke into every other hole on the upper flange. If this is a rear hub, this set of spokes will be on the left side so use spokes from the longer set.
- Step 3: Insert a spoke into the hole to the left of the valve hole. Screw spoke into a nipple four turns.
- Step 4: Insert the remaining spokes into every fourth hole in the rim.
The second set of spokes
- Step 1: Turn the wheel over. If it is a rear wheel, the sprocket side will now face up.
- Step 2: Find the hole in the rim that is next to the first spoke from the first set and one hole farther away from the valve hole.
- Step 3: Find the hole in the upper hub flange that is above the first spoke from the first set, but slightly displaced away from the valve hole.
- Step 4: Insert a spoke into this flange hole. The spoke should fall next to the first spoke from the first set on the side away from the valve hole. Secure spoke into nipple of hole from Step 2
- Step 5: Insert a spoke into every other hole of the upper flange.
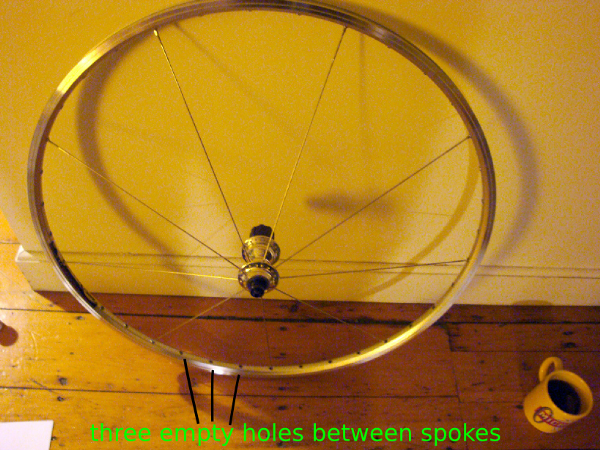
- Step 6: Attach spokes to every fourth hole in the rim. The first and second set of spokes should form a radial pattern. The rim should alternate having two adjacent spokes followed by two empty holes.
The third set of of spokes
- Step 1: Keep the wheel in the same orientation. If this is a rear wheel, the sprocket side of the hub should still face up. Drop an outbound spoke into each of the remaining holes in the lower flange.
- Step 2: Turn the wheel over and fan out the spokes.
- Step 3: Rotate the hub so that the frist spoke from the first set pulls away from the valve hole.
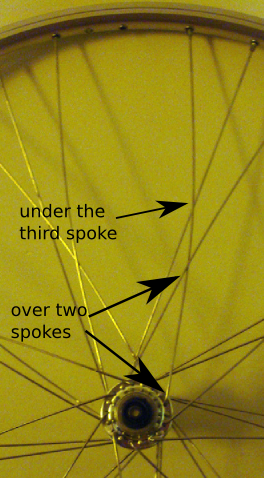
- Step 4: Cross one of the 3rd set spokes over two adjacent spokes and under the following spoke. Attach the spoke to the first free hole in the rim.
- NOTE: Crossing the spokes over two and under one neighboring spoke is to make a cross-three spoke pattern.
- Step 5: Attach the remaining 3rd set spokes in this over-two-under-one manner.
The fourth set of spokes
- Drop the remaining spokes into the free holes of the lower flange. Turn the wheel over and fan the spokes.
- Attach the 4th set of spokes to the remaining rim holes using the same over-two-under-one methods as for the 3rd set.
Confirming that the lacing is correct
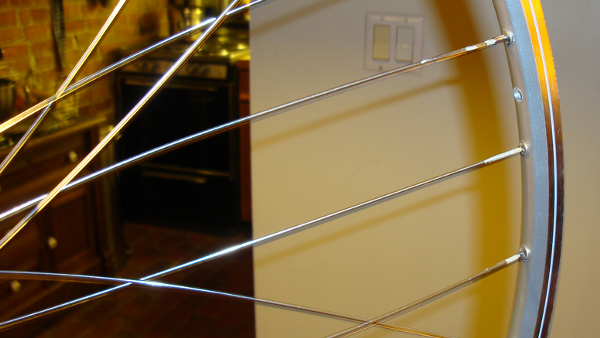
- Check 1: Is the valve hole between two parallel spokes?
- Check 2: Are all spokes from a given side of the hub entering holes in the rim that are offset to the same side?
- Check 3: Are all the outer spoke crossings the same distance from the hub?
Tensioning and truing the wheel
Wheel truing: 4 basic concepts
- Wheel dish: The 'dish' of a wheel describes how well the hub is laterally centered on the rim. Before truing the wheel, I like to get a basic idea of how well it is dished. If the dish is too far off there is no point in spending too much time truing. Dish can be most easily be checked using a dishing tool. Alternatively, dish can be checked by putting the wheel in the stand, aligning the calipers, and then flipping the wheel around. If it is well dished, the calipers will still align with the rim properly.
- If the wheel is off center to one side, loosen all the spokes on that side by a turn and tighten the opposing spokes. This will pull the wheel towards center.
- Wheel trueness: Wheel truing improves the lateral and vertical roundness of the wheel. Lateral trueness refers to the left-right wobble in the wheel. Vertical truing is the 'roundness' of the wheel and is improved by removing high and low spots in the rim.
- Lateral truing: If the rim wobbles to the left, tighten the corresponding spokes by half a turn that go to the right side of the rim. This pulls the rim to the right. Also, loosen the spokes that go to the left side of the rim so the overall tension on the rim does not increase.
- Vertical truing: If there is a high spot in the rim, tighten the surrounding spokes by a turn. Tighten spokes that go to both sides of the hub so the lateral trueness is not changed.
-
Spoke tension. It is important that all the spokes be at the proper tension (plus or minus 20%) in order for the wheel to remain round and true. Expert wheelbuilders can apparently measure spoke tension by plucking the spoke and listening to the tone; a tigher spoke produces a higher pitch tone. However, this is way beyond my expertise so I use a tension meter, which measures the tension of a spoke as a function of how much it bends under a fixed load. The final, desired spoke tension is determined by the strength of the rim. Higher spoke tension makes for a stronger wheel, but the maximum tension supported by the rim should not be exceeded. From what I have seen, 100 kilograms-force (KgF) works fine for most rims. This table shows correlated spoke tension (KgF) with tension meter readings. The spoke diameter must be known to do the conversion. If the spoke diameter is not known, it can be measured with digital calipers. The diameter of butted spokes is measured at the middle where the spokes are thinnest.
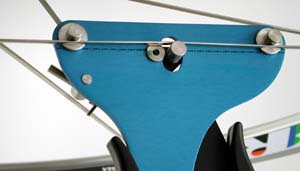
FIG Measurement of spoke tension with a tension meter. (Image from the Park Tool website).
-
Stress Relieving: When tensioning the spokes, spoke stress should periodically be reduced by grabbing pairs of parallel spokes and squeezing them as hard as you can. I put a rag on the spokes so they don't cut into my palms.
Wheel truing protocol
- Put on the the rim tape. In theory, spokes can rupture under tension. Adding the rim tape now can keep a ruptured spoke from shooting out of the rim.
- Add a drop of oil (chain lube) at the base of each nipple so it turns freely against the rim.
- Tighten each spoke up to the point where no more threads are visible. When tensioning spokes:
-
Start a series of spoke adjustment at the spoke next to the valve hole to keep track of which spokes have been tensioned.
-
When tightening a spoke, overtighten it by a quarter turn and then undo that last quarter turn. This helps to avoid spoke twist.
- Iterative truing: wheel truing is a repeated set of steps to gradually bring up the spoke tension while maintaining wheel dish and lateral/vertical trueness. Iterations are repeated until the wheel builder is content that an additional round would have no further benefit. Here is what an iteration of truing consists of:
-
Put the wheel in the stand and align the calipers to the sides of the rim. Spin the wheel in the stand. How is the lateral trueness? Tighten/loosen pairs of spokes until true.
- Move the calipers to the outer surface of the rim. Spin the wheel. How is the vertical trueness? Tighten spokes to remove high spots and loosen spokes to remove low spots.
-
Check the tension of each spoke. With each iteration the spoke tension should gradually increase to reach the final tension. Does the tension in any of the spokes exceed the goal tension? If so, lower the tension in these spokes.
-
Remove the wheel from the stand and check the dish. Is the hub centered on the wheel? If not, loosen/tighten all spokes to correct dish.
-
Stress revieve the spokes by grabbing pairs of parallel spokes and squeezing them as hard as you can.